
I have done a lot of different renovations in my past, but I've never taken on such a big project. After speaking with Terry, he has done a few big jobs like his rental in Chatham and the house he lives in now. Although this one is intended to be a purchase renovate and sell project, he is just as excited as I am to get going.
Thanks
to the 'financial' assistance of my father-in-law, I have purchased a
renovation project with another friend named Terry. Together, we plan
to renovate and sell this home.
I am looking forward to the
final project, but that's at least 120 days from now. (ok, now 120 days was based on aproximately 4 to 5 people working 40 hour weeks but this did not happen) Terry and I hope
to have the house relisted for sale by September 1st. (the project took 11 months to complete due to other employment and time / travel issues) However, due to some unexpected and a few expected delays, we completed the project of an eleven month period.
When we bought this property, we had a number of 'city of St. Thomas'
issues that had to be done. These issues require the City to send
inspectors and for us to contact an engineer for the construction. Now
there are many people out there that get angry with inspectors and call
them names. But truthfully, they have a job to do just like you and
I. The only reason people get upset is due to the loss of time,
expense and the hassel of contact. I admit, that we both had had these
thoughts, but we both also realized that we wanted to do it right.
After the first inspection after our engineer had given us our
instructions, we realized that it would be best to have both the
inspector and our engineer at the location at the same time. This
way, the inspector could tell us the issues he seen and our engineer
could converse with him as to what would satisfy the situation. We
were very pleased to get all the information passed equally between
each of us. The work went quicker and the job was completed as
efficiently as possible. So give these guys/gals your respect and work
with them.
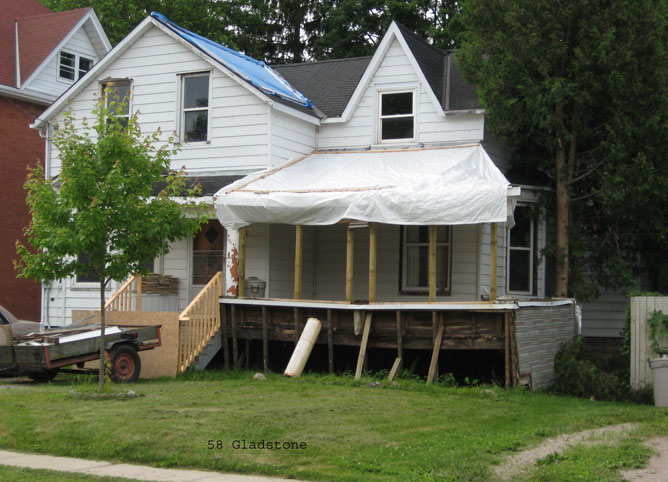
As you can see, from the beginning of this project both Terry and I knew we had a lot of work ahead of us. Both on the outside, and on the inside.
The exterior had a collapsing front porch with a city order to be removed/renovated. Terry went down to the city right away and got us a building permit.
Working only five hours each evening after an eight hour shift at the factory, Terry slowly took the front porch down.
Front view
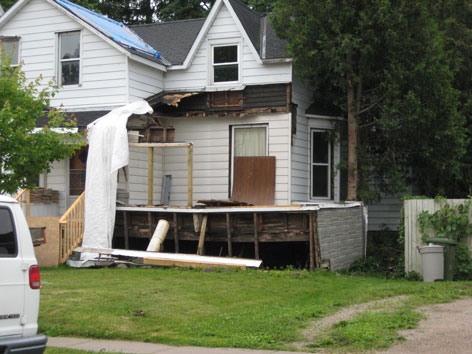
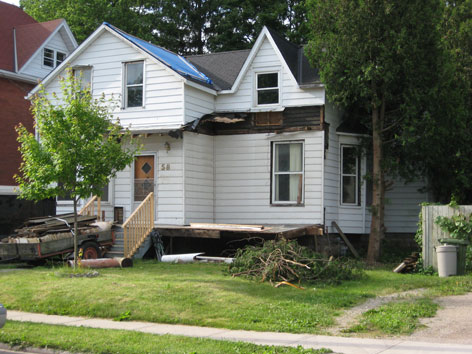
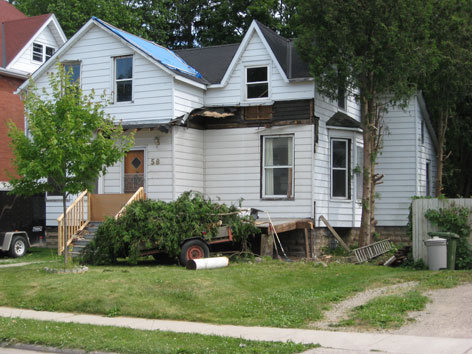
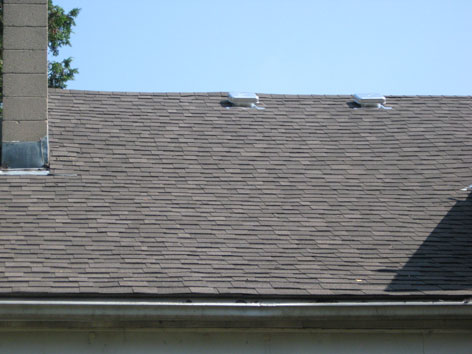
As you can see by the photo on the left. We had our new roof installed. A two tone brown and we added four new vents on the back side of the roof. This will help with ventilation. The new roof was on by the end of the third week.
Below you can see that July was a very warm an humid month. We poured the post holes on one of the hottest and most humid days. The photo below to the left shows the humidity in the early morning that we worked in. Terry has been very hard at work on the new porch. The joists going up here are on July 23rd. Terry hopes to have the plywood on by the end of the weekend. You can see from the middle photo that all of the cedar trees have now been dropped and between jobs, we do some clean up and removal. Also, you can see how much nicer the roof looks.


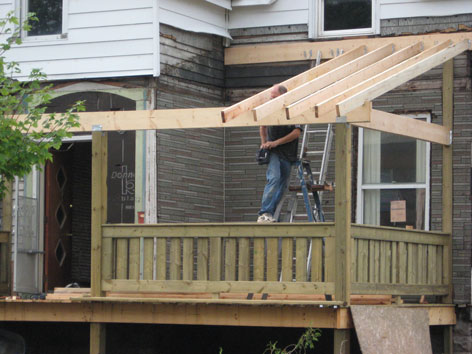
Below are a few new pics from July 26th and Aug 2nd.


Terry and I started the steps on Aug. 2nd. Pouring the concrete for the lower posts. Building out the header for the top step and adding the upper posts.

With the steps now finished except the bullnose bottom landing, we moved onto the rest of the porch. Terry has worked very hard at renovating the front porch. I am very pleased with how it looks. After the porch was finished, we began removing the siding. Under that, we found some areas in need up filling so that the siding will sit level. Under the West facing bay window (right side of pics) we built out the bay window all the way to the ground. I am having some trouble uploading images at the moment, but I'll get them up as soon as possible.
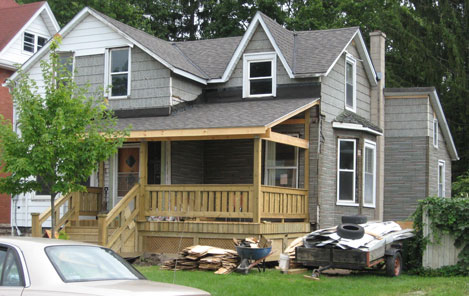
I keep telling myself that the siding is going on soon. I am very excited to see the siding on the house. I just know the colors we have chosen will be fantastic. Adding quality and substance to this home. I just know our neighbors will be happy. As you can see to the right, that the old insulbrick sure takes this house back into the 60's.
You can really get a good look at how the new porch adds so much to the house. Great work Terry !!!
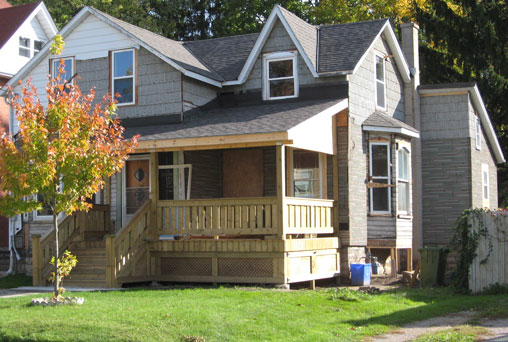
A little larger picture as of Oct 15th. We finally took the trailer full of aluminum siding away to the recycle station. About 450 pounds netted us $264.00. So now we have more coffee money. The porch is closed in and the facia pieces are on. Now fully ready for the white facia and trim pieces and siding on the closure. We'll be putting the wicker color on the closure triangle and on the underside we'll use white to help with keeping it bright under the porch. We also finished the bullnose landing step which is in the next photo.
 Twenty four bags of concrete and two tired me with sore backs and you get the landing to the right. Done to appear rough to go along with the style of home.
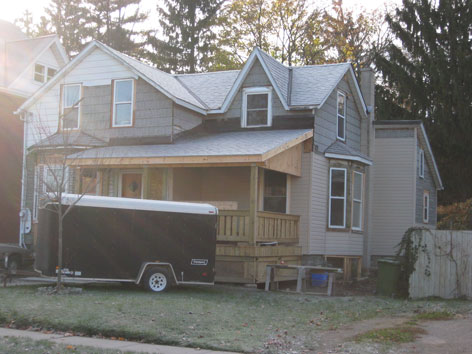
The siding is finally going on. Day one we finished under the porch. Day two we worked on the west side bay window. The color we chose works very well with not only the house and porch. But it will blend in well with our neighbours.
I'll put up a few more pics from day 3 including a shot of the back.


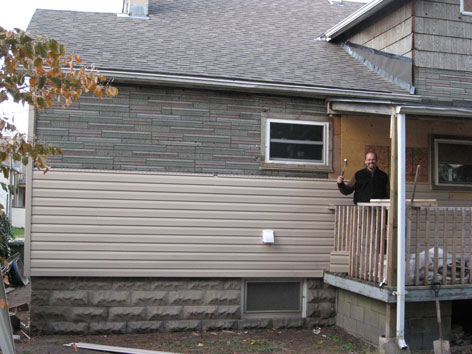
By the time I left the house for dinner, the back was finished by Frank (on the back porch with hammer) and Terry. We will add the flashing to the top of the front and back porches so that we can do the siding there on day 4. We figure that it will take ten days work for the three of us.
Here are a few photos of the siding and flashing going on. Not in any order, and I have more on another card yet to be uploaded.

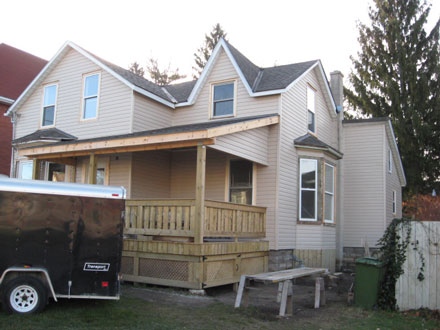

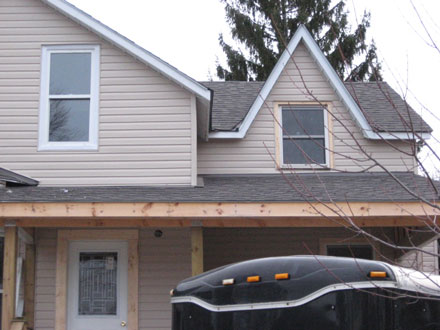

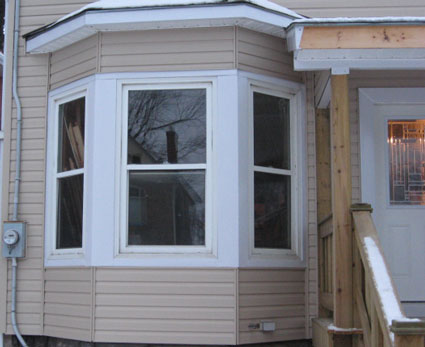
As you can see the bay window at the front has worked out very well. I had considered using vertical board and batten under the window with a darker taupe but we just kept the same theme around the whole house.
Fossil
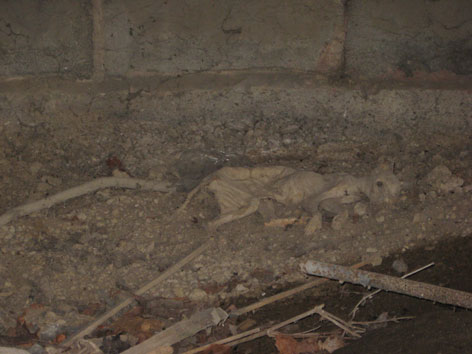
Also trimming the cedars on the west side, the front porch cover and rotten parts came down in just over 15 man hours. We found this interesting 'fossil' under the porch.
We figure it was a cat or a possum. We plan to bury our little fossil when time permits.
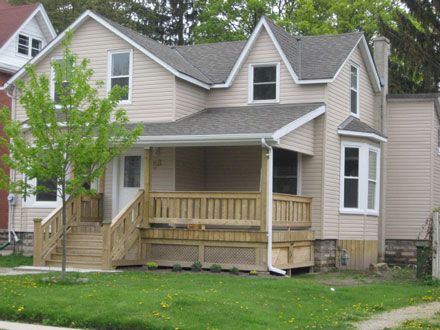
Well, here is the finished outside of this beautiful home.
Original and only Bath
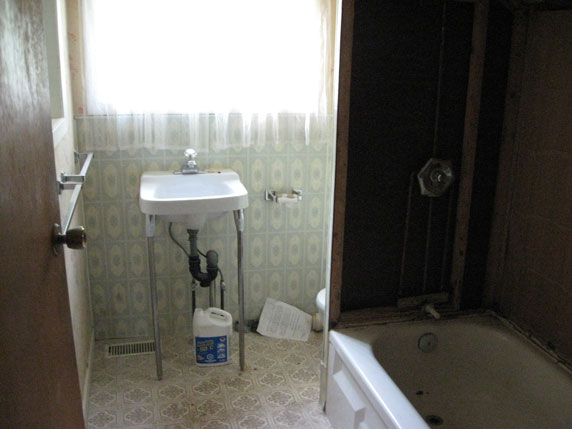
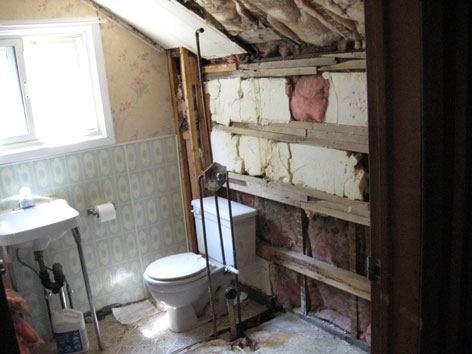
The bathroom upstairs was completely demolished including an area of the floor which had rotted under the toilet. Fully rewired and ready for drywall.
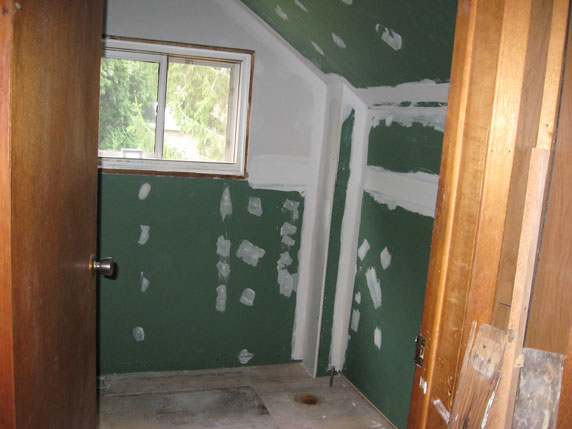
As you can see, the upper bath has been drywalled, the pipe closed in and new floor braced in. Actually, as you are reading this, the upper bath is ready for primer, so I'll get a new pic up soon.
All but the trim around the door, window, and baseboards. Now that is a very clean and perfect bathroom for the upstairs wouldn't you say?
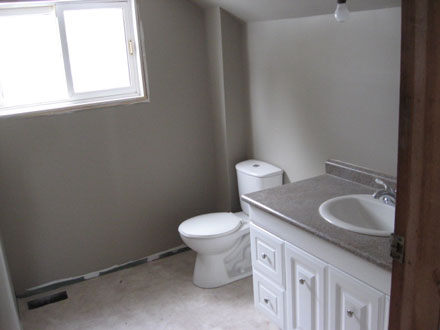
The Den
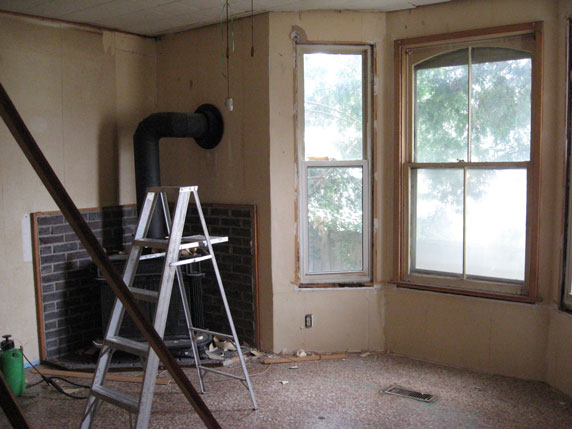
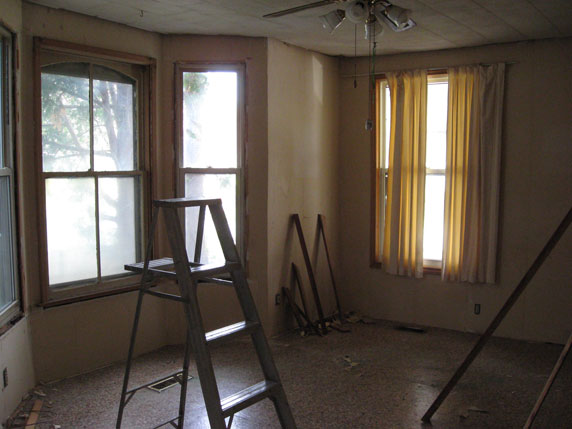
The Den, (West side of house) had a wood stove that had obviously been used poorly (soft wood) and a chimney that needed a good sweeping. We removed it because of a few reasons. First is the insurance reason. Everyone knows how hard it is to get your home insured with a wood stove in it. Secondly, it just didn't look very attractive in the room. The bay window to the west has two new windows and we'll be ordering a third for the center soon enough. The ceiling tile will be removed and drywall added. This room will have a new sub-floor added to quite the old floor creaks and likely carpeted. That ugly heat vent, in the middle of the bay window will be moved to the wall where the wood stove now sits.
We removed the fireplace and gave it to someone who plans to use it in a garage. It was very heavy. We have found a newer window for the north and we plan to have the north window repaired and placed into the west bay window. We were pleased that they were both the same size.
You should be pleased with the finished look of the den.
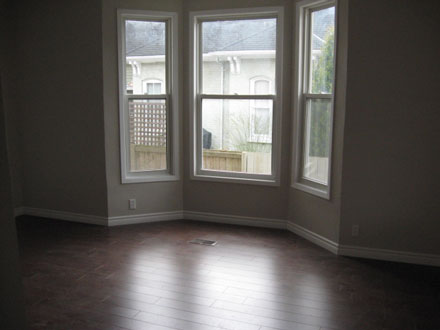
The Dining Room
 The Dining room is long enough to allow a very nice sitting area near the bay window. There is a small slope on the floor between the return and heat vent. We will be adding a support wall in the basement to attempt to lift and support the floor better. The ceiling tile will be taken down and drywall added. A few pot lights near the bay windows to accent the walls for a little lighting. and this room will also receive a new sub-floor and laminate.
We never intended to remove the ceiling tile, but after a few tiles removed to double check what is up there, we found that the drop ceiling was not up to par.
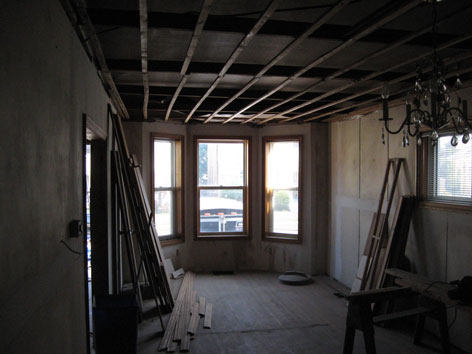
The spacing between the joists were almost 4 feet. So after some discussion (recommended by Pops) I took the tile down and added more reinforcements. Joist hangers and ceiling reinforcements were added. Now we know that the drywall will hold up. Better done right the first time.
As you can see, we added the drywall in the dining room. Alternating the ten foot sheets so that we could just add the 4 inch strips to every other end. This will help keep the seams in the ceiling stronger.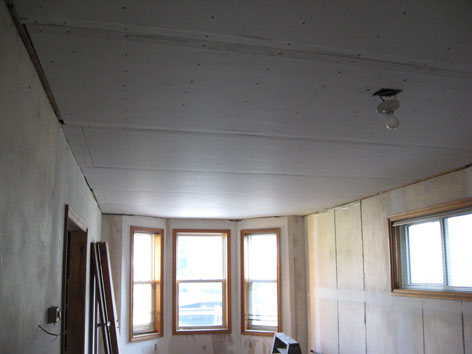
Even from only adding the drywall, you can see how much brighter the room is.
We have now given the Dining Room two coats of mud and sanded it all down. There will be one more skim coat of mud done when the rest of the drywall has gone up. No sence in a final finish coat and sanding when the room is being used and potentail damage is possible.
I was very pleased with the finished look of the Dining room.
The Entrance
 The entrance is very old and dated. From the front door (which has more holes from different locks on it that I care to count)
We'll be removing the paneling, changing the front door, removing the tile ceiling and adding drywall, and new flooring.
We have now removed the paneling, the light in the closet and all the ceiling tile. We have one piece of drywall up in the ceiling and we'll finish the drywall here once the Hydro (rough in) inspection is done.
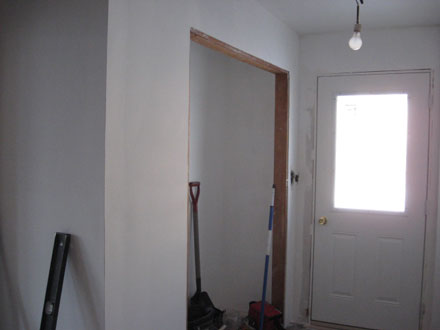
The same entrance way looks so much brighter and cleaner with drywall. The closet doors will be white and the wall will have a bit of earth tone colour soon.
Stairs to Second Floor
 The stairwell is very dark, and the closet to the left side runs all the way back and has access to the basement. We will be closing it off from the basement as there is an entrance to the basement from the Kitchen. All that paneling will be replaced with drywall. The archway on the right (cannot see in this image) will be widened similar to the one on the left. (left to the Dining Room, right to the Den)
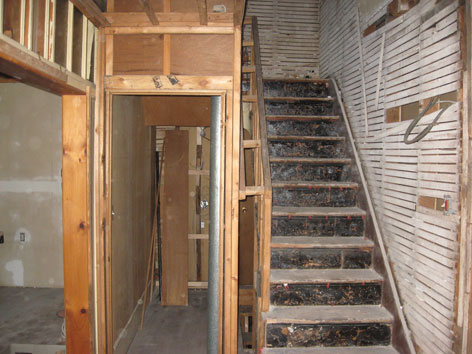
As you can see to the right, we removed the plaster from the stairs and much of the paneling. There is a 6 inch gap between the stairs and the closet which we plan to add to the steps.
We have not done much to the stairs as of yet. This needs to be done after we have all the drywall up the steps. I did move that heat vent to the left side of the closet and inside the wall. Thus adding heat to bedrooms 1 and 2 which had no heating vents. Now each bedroom upstairs has heat.
Now you can see the stairs are wider by aprox. 6 inches and very solid. Ready for paint and carpet on the steps here.
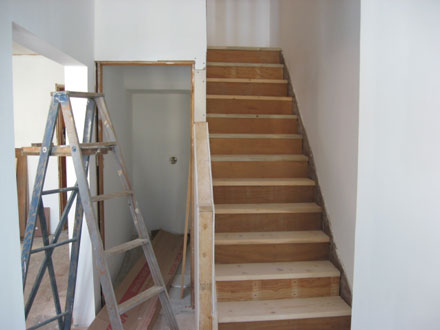
I am very pleased with the finished look of the stairs. We only need to add the railing in this photo.
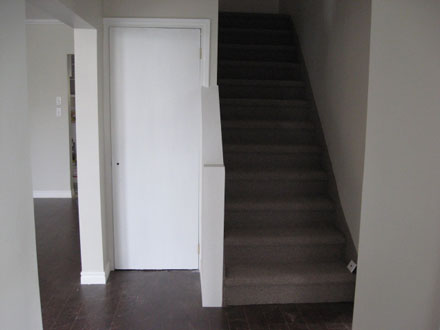
Kitchen
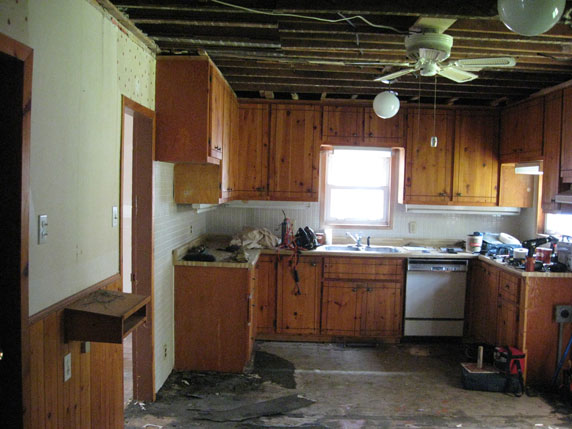
The Kitchen has a few issues in the ceiling joists. I figure a two day job for the two of us. It needs a good update in colour and a new dishwasher. Then paint and a new laminate floor that looks like tile would be a great finish.
The door to the immediate left is to the basement and the second one is the Dining room.
The kitchen had a tiled ceiling and very uneven.


The photo above are the ceiling joists in the kitchen. We have a 'work order' to build a header across four beams to allow for the plumbing. The plumbing is from the upper bathroom. Once we have moved the plumbing to account for the new double sink and removal of the old one. We will build in the header. Double up the joists on each side of the header and brace up the flooring below the toilet. It seems a bit weak. Once the inspector comes through, we can re-strap the kitchen ceiling and drywall it. You can see from the second photo that I've added the new support joists and the header. The upper bathroom floor was cut open and will be replaced once the plumbing is finished and in place.
Ok now you have seen the joists that I had to add in the kitchen, well, I misunderstood the instructions and had to add to the rest of the exisiting kitchen joists. Another 3 days work. It may sound easy to some people but try adding an 11 foot, 6 inch joist into an 11 foot 3 inch drywalled room. It looks like they are all doubled, but that other board is a 2x4 not a 2x6 and had to be removed and replaced.
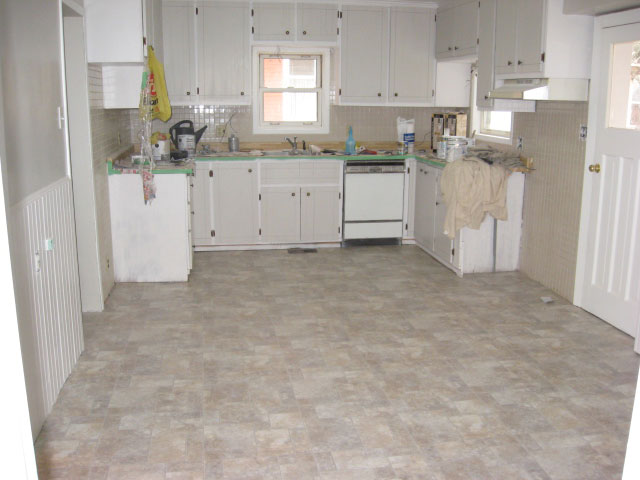
The kitchen pic below shows it half done. I am actually done (except flooring) now while typing in here but the photo was not clear for some reason. I'll have to take another one.

The finished look of the Kitchen including the flooring is very pleasing to the eye and appears clean and spacious.
Odds / Ends and Work Orders
As I had said earlier, the city inspectors had been in the house and have written orders to do 6 main repairs. Most of them pertain to the front porch but there are a few others. 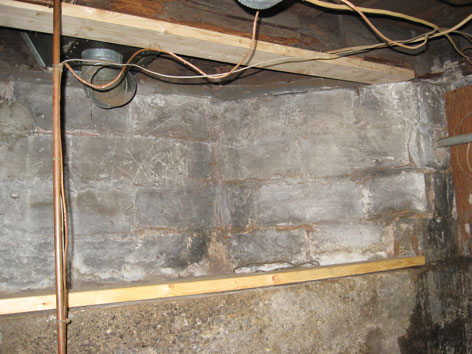
At the front of the house, you can see a bay window which has a rotten beam under it. We have a work order to support it. So, under the beam in front of the bay window and the foundation I had to build this 2x6 double header support wall. It took me about 7 hours to remove the old portion of the beam and rebuild under it. Being careful not to disturb any hydro or the main water to the house.
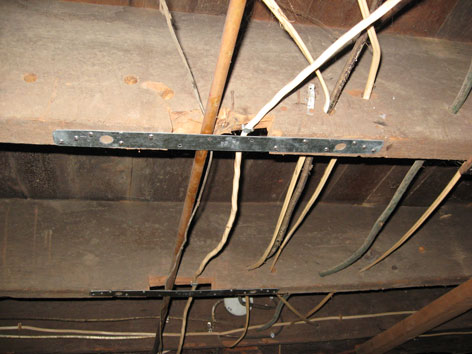
To the left, I'm showing where we had to add Simpson Strong ties across the bottom of cut floor joists. This is also a work order from the city. I can fully understand why too. To cut the bottom of a beam/joist is absolutely foolish. You weaken the beam/joist so much more than you think. But there are many people in the world that don't care. To have done this right, a simple hole through the joists like the ones that have wires going though would have been much safer and the strong ties would never have been needed. We have about six (6) places where we had to add strong ties.
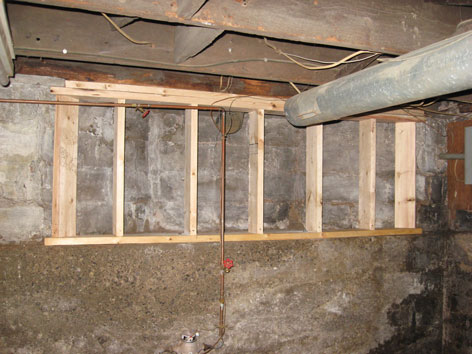
 This wall in the basement runs east to west. Only inches from a main beam which has a lot of dry rot. We were instructed that we needed to build this wall to support the kitchen floor joists. This wall required us to cut out the existing concrete floor and add a 16x8 footing. Once the floor was cut out, dug to 8 inches deep and 25 plus bags of concrete was mixed and poured I built this support wall. Double header top and single bottom with anchors.
Now we have had to add 3 more partial walls similar to this one in the basement to reinforce the main beams. Plus we moved an existing wall over 6 inches. From under a joist, to under a main beam.
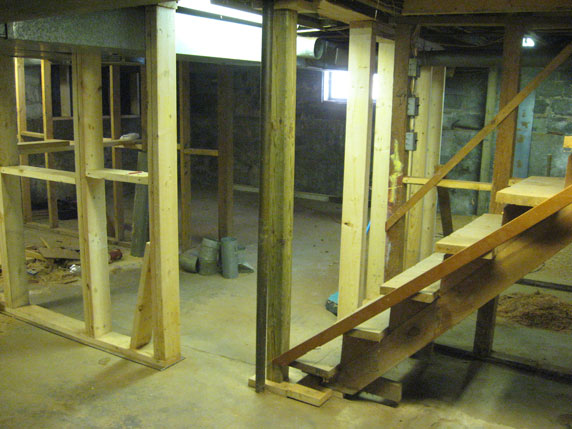
I had to trim/shave down the main beams to good wood. Aproximatly one full inch. I did this with a portable planer. Although I was absolutly covered in shavings and ancient dust, the planer worked much better and a chisle. I did try to just use a chain saw like I used under the North bay window beam but there was not enough room to be able to cut safely.
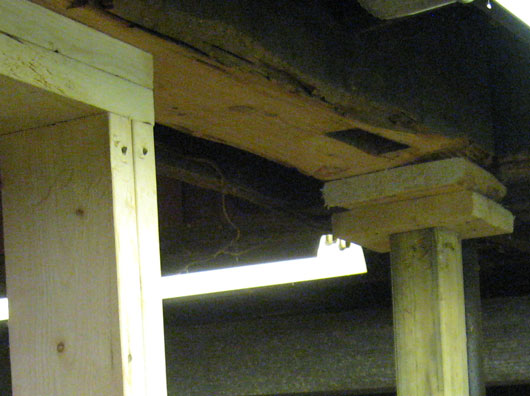
To the left you can see where I shaved back the main beams to add a support wall. At both ends of this wall I had to add a 4x4 post because of a walkway and stairs. Another wall had to run between the ductwork. What a pain.
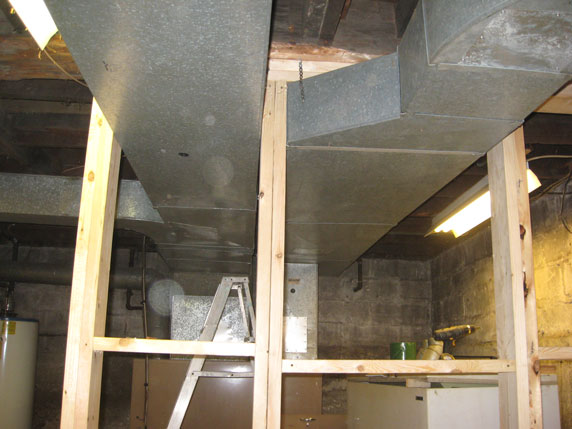
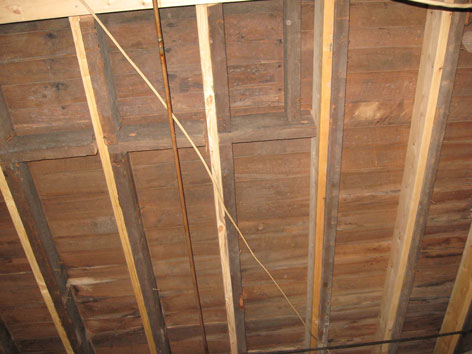
To the left, you can see that I have doubled up the floor joists under the kitchen. Part of the work order mentioned that because of the cross headers in the floor joists, there was not enough support. I simply cut out these headers and added another floor joist which rests upon the new support wall and is screwed to the existing joist and anchored to the far wall with corner joist hangers. In the photo, I still need to add the braces between the joists to prevent twisting. I was asked to go back to this section and add more nails. Double top and bottom every 18 inches.
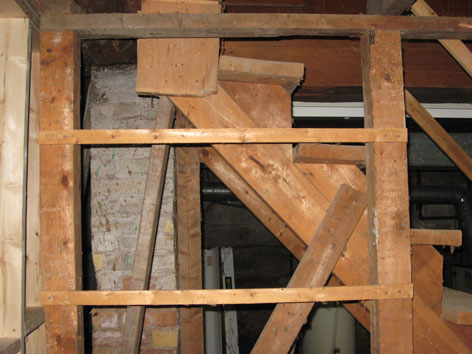
The stairs to the basement are not the greatest so we will be repairing them later on. Once the porch and kitchen supports are finished and our inspector has passed all our work orders, we'll use the left over wood to do the repairs for new supports. Hopefully we will not need any more wood. There are a few more reinforcements we are going to do in the basement to stop creaking noises in the main floor.
I did reinforce the stairs near the bottom while I added the 3rd and 4th main beam support walls.
 Lets call this picture from bedroom 4 ... ummm.. lets see. "Hydro from hell" ? or maybe "Dumb home owners that want to burn down their house" ? or how about simply " Hydro issues "
I have a hard time believing that people are foolish enough to run hydro wires just below the surface of drywall or plaster. Without placing wires in the middle of a wall, even a tack or short screw could penetrate a wire and electrocute someone. Imagine if we had not been patient enough to inspect every inch of wiring in this house and left it there. What if we had left the paneling on the wall and drywalled over it. Only to send one screw into the wire and either being shocked, hurt or even killed. Or maybe nothing but a hot spot and burn the house down.
Worse yet, whoever did this job, joined two wires with mars and electricians tape. No junction box. So, we pulled it out completely all the way back to a junction box. Where we eliminated the outlet all together.
New Bath
The new bath has yet to really be started yet, however we have replaced the window and the old floor tile in preparation for the work to come. The short all toward the bath room shows the entrance to the Laundry Room.

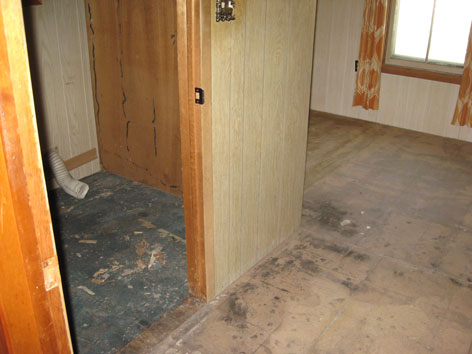
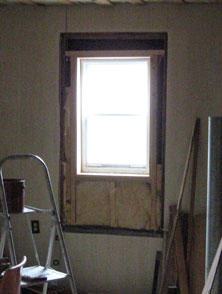
Here you can see that we placed a bathroom window into the new bathroom. The other one was so big and out dated, we had to change it and we found a great deal on this one. Paneling will be removed and the entire room drywalled (checking for insulation) a new doorway will be build and an enclosed tub with lots of shelves.
The new enclosed tub / shower below went in just to the right of the window.

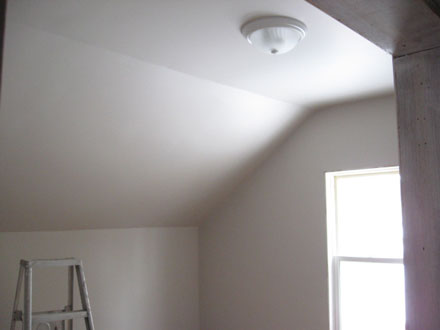
Bedroom 1
Remove all the ceiling tile, drywall, fix window, remove flooring, replace and paint. By the way, we added a heat vent to this room. Does this not look like a real bedroom? I should say it does!

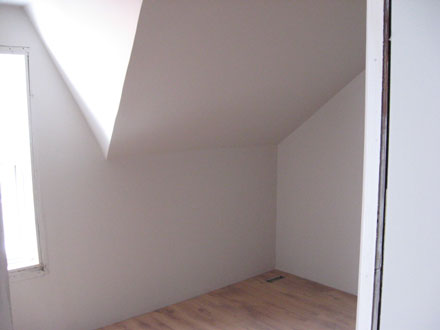
Bedroom 2
Remove tile ceiling, paneling, flooring, replace the window with a new one, drywall, add new flooring and paint. This room also had a heating vent added to it. A huge improvement.

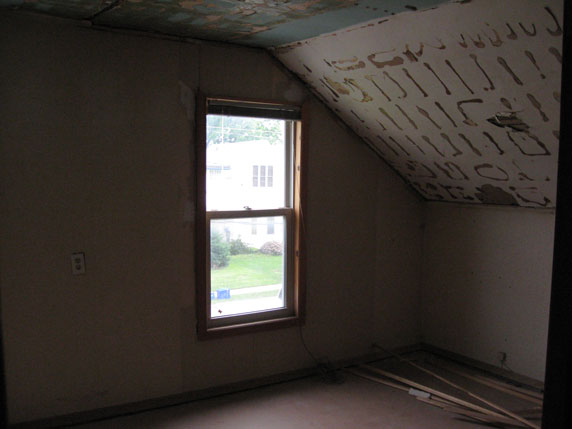
Bedroom 3
Remove ceiling tile, paneling, flooring, remove repair and re install the two windows. Drywall the entire room and closet, paint, and add flooring. This is a very nice room now.



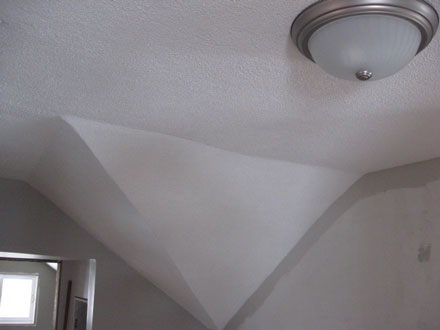
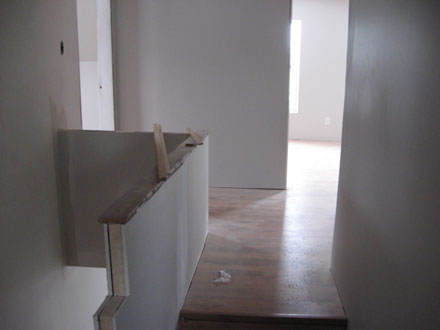
Upper Hall: Remove paneling, flooring and stair rail. Create new rail. Stucco the ceiling which is very much not square. The stucco helped to cover the uglyness of the ceiling but I just couldn't bring myself to rip all that out so that was my " easy out " in the hall. You can see in the photo with the new light, how uneven the ceiling and angles really are.

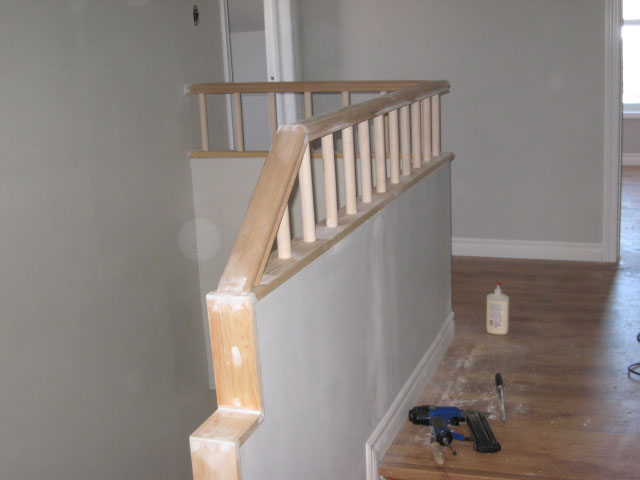
As you can see the new rail is in and requires a top yet. But the floors and walls are finished in this photo.
With the upstairs railing requiring me to customize it, I took my time to do it just right. The photo below was taken before I painted the railing white.
Windows 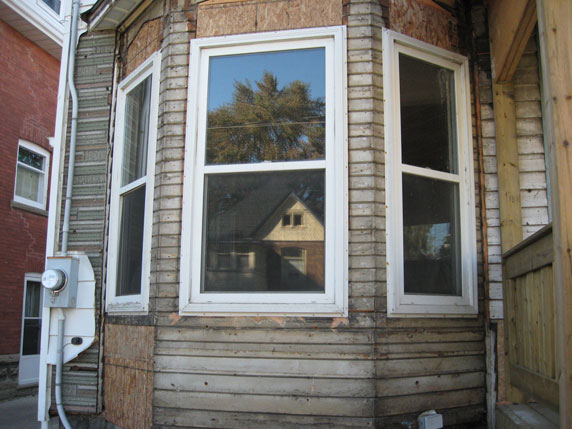
We purchased 2 new windows for the house, had 4 repaired and bought 2 others as used but in very good condition. In many cases, we had to remove and replace windows to adjust each window to be level and equal distance on window trim/ledges. Moving and adjusting windows allowed us to ensure that each were installed properly. Which they were not. Now insulated and installed properly, each window will give a new home owner many good years. Here I'm showing the front bay window so that you can see the new wood areas where we needed to rebuild the window boxes and shim in properly.
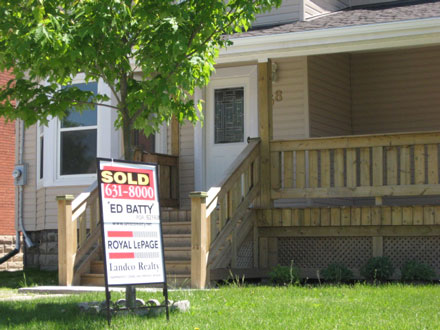
The best parts of the renovation happened shortly after I spent an hour or so with our Real Estate Sales Representative Ed Batty. That's right, the For Sale sign went up on the front lawn.
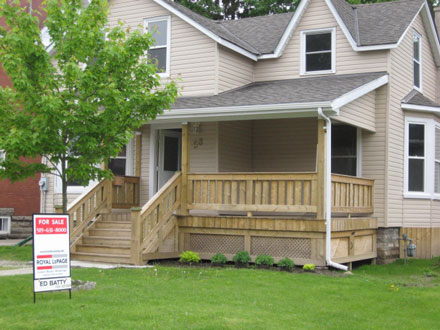
Then, just under 5 days later, that wonderful FOUR LETTER WORD was placed on the sign.
SOLD
Two happy renovators:
Terry Tenk (left) James Oke (right)

So now what Terry? Another house you say?
Ok !!
